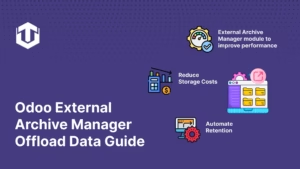
How to Offload & Archive Odoo Data Efficiently: A Complete Guide to the External Archive Manager Module
Managing database growth is one of the most critical challenges for growing businesses using Odoo. As transaction volumes increase, so does the size of the database, leading to slower query performance, longer backup times, and increased storage costs. The Data Offload / External Archive Manager module by Techultra Solutions offers a strategic solution to this problem. It provides a robust mechanism to offload selected fields of business records from your main application database to an external PostgreSQL database. This allows organizations to keep their primary database lean and fast while retaining secure access to archived data for compliance and reporting purposes. Why Does Your Odoo Database Need an External Archive Manager? As your Odoo system matures, certain tables, especially those related to logs, attachments, message history, and audit trails, can grow exponentially. This growth impacts your system in several ways: Key Features of the Data Offload / External Archive Manager Module This module is designed with enterprise-grade features to handle data lifecycle management effectively: Step-by-Step Guide: Setting Up the External Archive Manager Step 1: Configure User Access and Permissions Security is paramount when handling data archival and deletion. The module introduces two specific user roles to manage access control: Step 2: Access the Data Offload Module Once permissions are assigned, authorized users can access the dedicated Data Offload / External Archive Manager app from the Odoo dashboard. This central hub allows you to manage all configurations and connections. Step 3: Configure External Database Connection To establish the link between your Odoo instance and the archival database, you need to configure the connection parameters. This includes the Host, Database Name, User, and Password for the external PostgreSQL server. Step 4: Configure Archive Model Settings This is where you define the logic for data offloading. You can select specific models (e.g., Sales Order) and choose which fields to offload (e.g., Total, Signature, Untaxed Amount). You can also configure: Step 5: Working with Sale Orders – Offload, Retrieve, Delete On the record form view (e.g., a specific Sales Order), the module adds three distinct action buttons: Offload, Retrieve, and Delete. These allow users to manually manage the data lifecycle for individual records. Step 6: Before Offload – Data Preview Before the offload process runs, the data resides normally in the Odoo database. In the example below, the Signature field contains data that contributes to the overall record size. Step 7: Before Offload – Field Size The system tracks the size of the fields to be offloaded. Here, we can see the data size for ‘Total Amount’ and ‘Amount Untaxed’ before the operation, indicating the space currently occupied in the primary database. Step 8: After Offload – Data Cleared Once the offload button is clicked or the scheduled job runs, the selected fields are moved to the external database. In the main Odoo interface, these fields will appear empty or cleared, as the data no longer resides in the local table. Step 9: After Offload – Size Reduction Verifying the impact: After the process, the size of the offloaded fields in the primary database is cleared. This confirms that space has been successfully reclaimed. Step 10: Viewing Offloaded Data in External Database The data isn’t gone; it’s simply moved. Administrators can verify that the records have been securely written to the external PostgreSQL database tables, ensuring data integrity is maintained. Step 11: Retrieving Offloaded Data If a user needs to view the original data, clicking the Retrieve button fetches the information from the external archive and restores it to the Odoo record instantly. This seamless restoration is key for user experience. Step 12: Deleting Archived Data For compliance with data retention policies (e.g., GDPR “Right to be Forgotten”), authorized admins can permanently delete records. A confirmation pop-up ensures that deletions are intentional. Step 13: Confirming Database Record Deletion Once the delete action is confirmed, the system permanently removes the record from the external database, completing the data lifecycle. Step 14: Bulk Operations – Multiple Records For efficiency, users don’t need to process records one by one. From the list view, you can select multiple records and perform External Offload, External Retrieve, or External Delete actions in bulk. Automation & Scheduling Capabilities To reduce manual intervention, the module includes powerful scheduling tools. Administrators can set up Cron jobs to run offload processes during off-peak hours (e.g., weekends or overnight). Similarly, purge operations can be scheduled to automatically delete data that has exceeded its retention period, ensuring your database remains compliant without constant manual monitoring. Batch Processing: The module supports batch processing and throttling, meaning it can break down large datasets into manageable chunks. This prevents system slowdowns during large data transfers. Conclusion: Is the External Archive Manager Right for Your Business? If your Odoo database is growing rapidly, leading to performance bottlenecks or increased storage costs, the Data Offload / External Archive Manager is an essential tool. It offers a secure, compliant, and efficient way to manage data lifecycle without sacrificing access to information. By automating archival processes and keeping your primary database lean, you ensure your Odoo system remains fast and scalable for years to come. If you are planning to optimize your Odoo performance and implement a reliable data archiving strategy, now is the right time to take action. Contact us today to discuss how the External Archive Manager can be tailored to your business needs.